How to Draw in Perspective - Examples Page
Click here for instructional Exercises
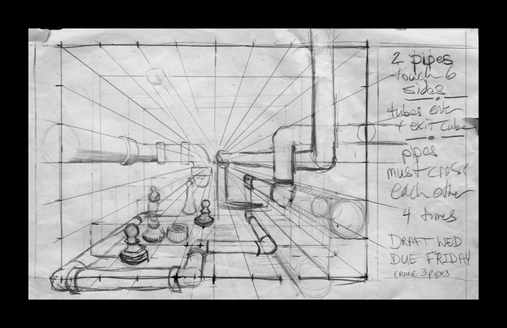
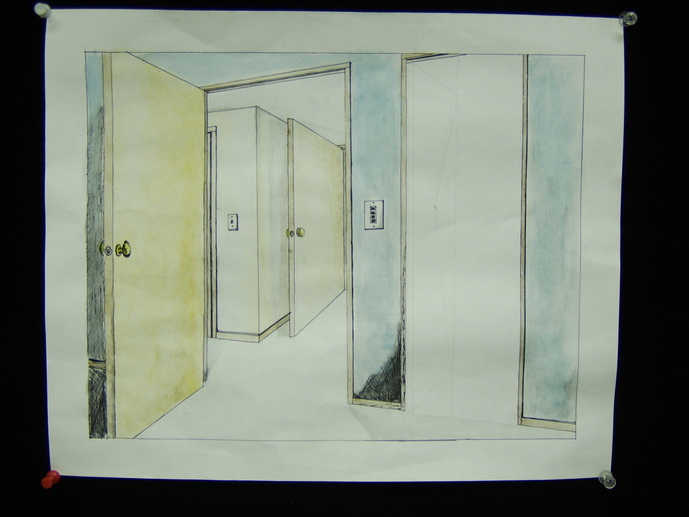
Left: this is an example of a complex one-point perspective
Perspective has a long history. There is clear evidence that humans have understood elements of perspective as far back as Lascaux's cave paintings where the far hoof of an animal is depicted as foreshortened as compared to the closer hoof.
There are excellent examples of Romans using perspective in the frescoes of Pompeii. Mathematical perspective, however, did not fully emerge until the Italian Renaissance and then in the Northern Renaissance in a different more tool-based form with Albrect Durer's Durer-Grid. Durer's example is like drawing a grid only he did it without photocopiers, transparencies, or Sharpies.
This image is an example of how to use drawing "mental technology" to create the convincing illusion of three dimensions on a two-dimensional surface. By using triangles, we can measure how much smaller things should look as they get farther and farther away. Instead of numbers, we use the relationships between the lines. As things move farther and farther back, the triangles tighten, making smaller and smaller squares.
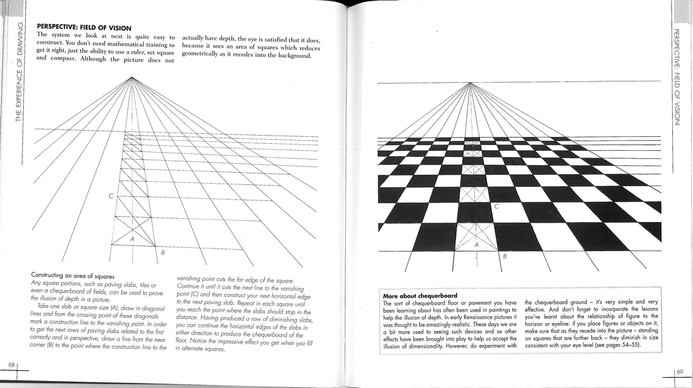
This Barrington Barber illustration really shows the magic of this old trick. Once you create the first row of the grid, you draw a line down the center of one foreshortened vertical column. When you draw a diagonal line from the corner (it doesn't matter which one, you just have to pick a side and stick with it) through the center of the back of the row, it hits the side of the other line. Where that diagonal hits the side of the other side of the column, you have found the new next row. Shampoo instructions, lather, rinse, repeat. By continuing to draw these diagonal lines, we end up with the figure on the left. When we shade in alternating squares, we see a floor or chessboard pattern that makes it clear what we have constructed, an illusion of three dimensional space on a two-dimensional surface (paper or screen).
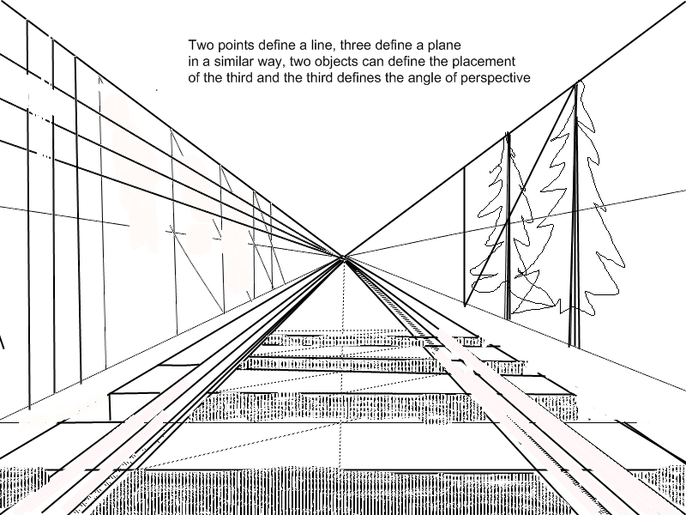
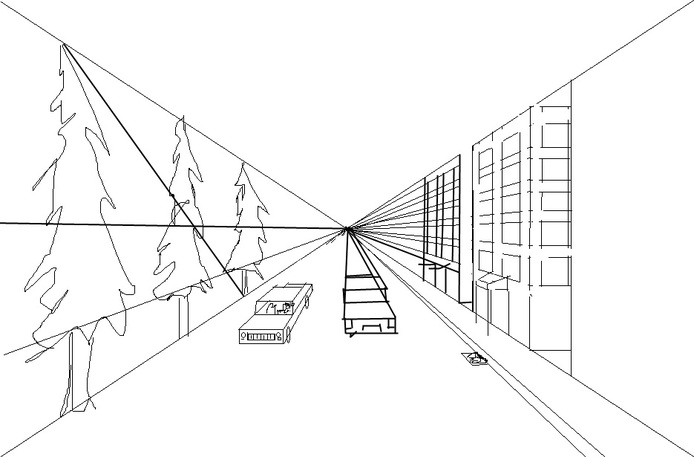
Here is a simple example of how it looks to have a partly set-up design of train tracks using this tool. Notice that the side grid helps us see how tall the trees should be and gives a sense of the vertical aspects of perspective.
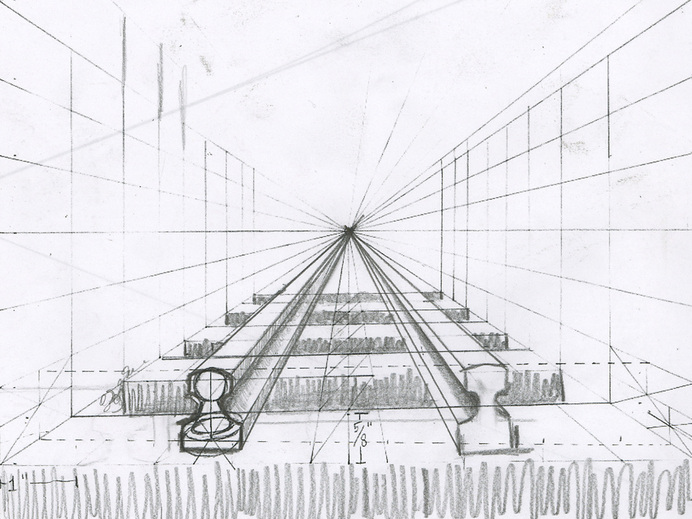
Here is the same drawing done by hand rather than using AutoDesk Sketchbook on an iPad.
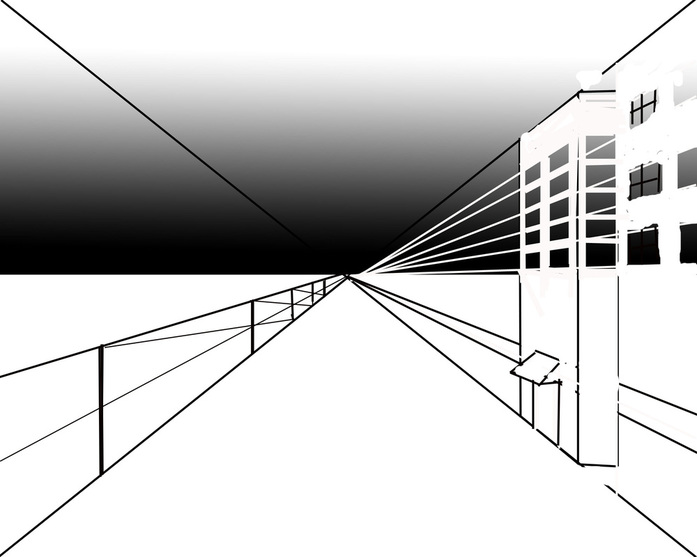
Once we understand how to make the grid, then we can really start using it to make our imagination a powerful design tool. By using guidelines from the vanishing point, we can figure out the angle of the tops of windows and the tops of doors. The left side of this shows how we can make fences, or in this case, those big chunks of concrete that either divide streets from highways or act as the walls for train tracks.
We will have to discuss how to figure out the awning and the spacing of the windows but those are specific tools that make sense only when we have these bigger concepts mastered.
We will have to discuss how to figure out the awning and the spacing of the windows but those are specific tools that make sense only when we have these bigger concepts mastered.
So first, two rules really help us to get this right. Objects that don't come at an angle are parallel to the top and bottom of the paper, objects that come closer or go farther away follow lines that intersect with the vanishing point. The front of the car is parallel to the top or bottom of the page, the sides of the car go to the vanishing point; they are either horizontal or vertical (unless you are doing a really challenging drawing but that takes us to a two or more-point perspective)

Here is a middle school example of what these tools can teach you. Next, lets explore this step-by-step.
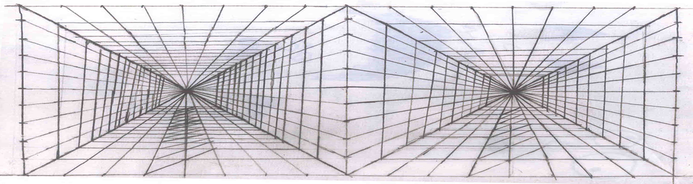
Two Point Perspective
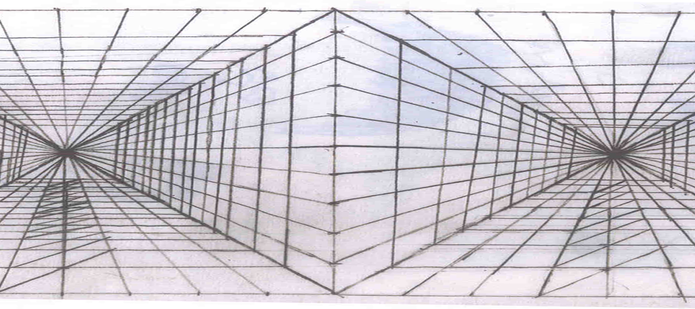
Two Point Perspective Example
Here is a really fun two-point perspective. Take a mental note, the vanishing points are uneven. Moving the vanishing points (when you have the hang of it) creates drama and interesting angles of view. This work is by Amber Sipich, MPA 2007
Three Point Perspectives
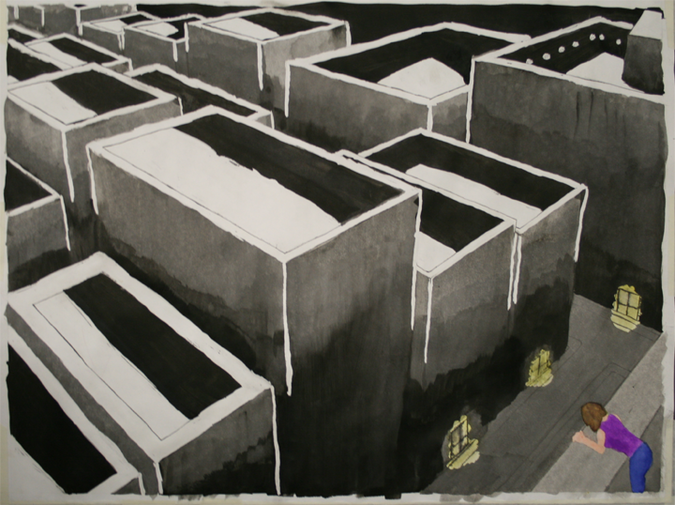
Three point perspectives offer an aerial view. This should not be confused with aerial perspective which creates its effect by muting the color hue and level of detail in the background to create an illusion of depth. This piece is by Angie Catania, MPA 2009
Four and Five Point Perspectives
We currently have no student examples of four and five point perspectives. Yours could be the first if you are up for giving it a try!
Six-Point Perspective
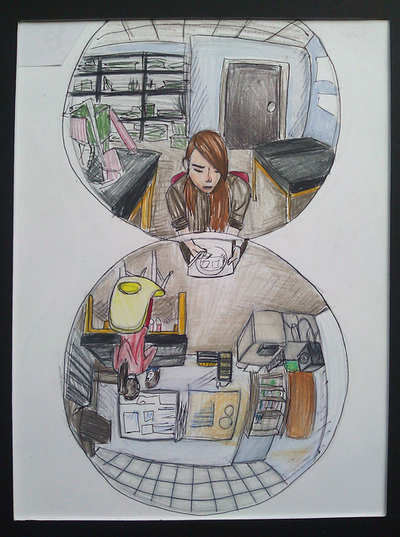
Six-point perspectives are more challenging but allow a magical world where the artist can depict a 360 degree view of the world around them. This drawing by Cat Langston, MPA 2017, really acts as a time capsule for our Middle School and Art History art room.
